- www.donhoover.net Home Page
- ZoneAlarm Help
- ZoneAlarm Help Home
- ZoneAlarm Overview Section
- Main
- Product Info
- Preferences
- ZoneAlarm Firewall Section
- Main
- Zones
- Expert
- ZoneAlarm Program Control Section
- Main
- Programs
- Components
- ZoneAlarm AV/AS Section
- Main
- Quarantine
- Spy Site Blocking
- ZoneAlarm Parental Control Section
- Main
- Categories
- ZoneAlarm Browser Security Section
- Forcefield
- ZoneAlarm E-mail Protection Section
- Main
- Attachments
- ZoneAlarm Identity Protection Section
- Main
- myVAULT
- Trusted Sites
- ZoneAlarm Alert and Logs Section
- Main
- Log Viewer

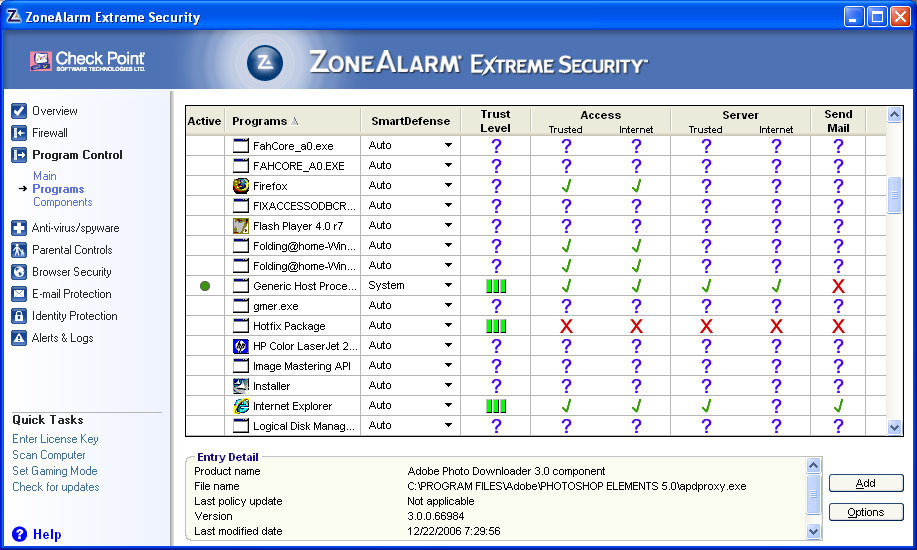
This section is the meat and bones section of ZoneAlarm. It is the program section. There are nine columns across the screen, and they can get complicated.
The first is the Active Column. If the program listed is active there will be a green dot in this column.
The second column is the program list. Some programs will have familiar names, others will not. The reason for this is ZoneAlarm pulls the name out of the program description that is part of the program. If the original writers of the program got lazy, well you will see weird things here.
The third column is the Smart Defense column. System denotes a system program. Auto means that you accepted what the Smart Defense Advisor suggested, and Custom means that you have changed something, or set the preferences manually.
The fourth column is the Trust Level column. This has to do with what a program can do. If you have set the Smart Defense Column on auto, then the trust level will always be checked against ZoneAlarms master list. If they detect that a change has been made in a program that rates a level change, they change it at the master list, and then ZoneAlarm on your system checks with it, and changes it on your computer. If you set the Smart Defense to custom, then it will not update. Three green bars means the program can do whatever it wants, and it will never ask you. Two green bars means a trusted programs can do as they wish, but unknown programs must ask. 1 green bar means all programs can only perform trust level actions, suspicious actions must be approved. And a red circle with a hash in it, means that program cannot run.
I am going to skip ahead a bit to the Send E-mail column. If this is checked, then that program is allowed to send and receive e-mail.
Now the Fifth Sixth, Seventh and Eight columns all work together. The internet zone is all the computers not in your trusted zone. Trusted Zone is all the computers you designate as trusted. Both of these are defined in the Zones Page. Access means that if a program requests something from the internet, it is allowed to receive the response back. Server means that the program can listen to the internet for a request. Server rights are normally used for Instant messenger programs and other programs like that. I suggest that you don't allow programs to have server rights unless absolutely necessary. The rank of rights goes like this. Trusted Zone Access, Trusted Zone Server, Internet Zone Access, Internet Zone Server. If you give a program any permission, then it also gets all the permissions below that as well.
Now there is one more section to this page. If you click on any program and then click the options button you will get the following window.
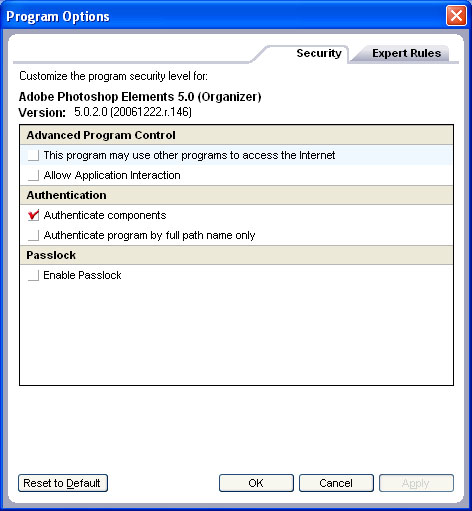
The first option is This program may use other programs to access the Internet Which means exactly what it says.
The second options is Allow Application Interaction which means that this program can interact with any other program that is also set to allow program interaction. This allows you to isolate a program.
The third option is Authenticate components, is basically every time this component is accessed, ZoneAlarm checks to make sure it has not changed either in size or location.
The fourth options is Authenticate Program by Full Pathname Only ZoneAlarm normally authenticates programs by finding its MD5 checksum. If you want to read about it, there is a basic description on Wiki. If you check this option, it will only make sure the location doesn't change.
The fifth options is Enable Passlock This is if you lock ZoneAlarm (if you right click on the ZA taskbar icon, you can lock ZA) then this program will still be able to get thru the lock.
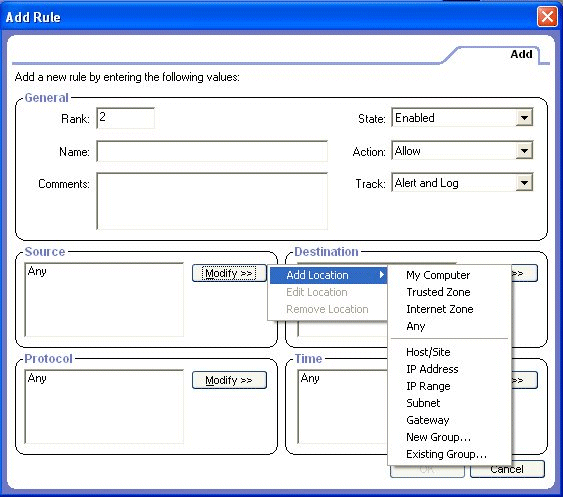
Now if you click on the expert rules tab you will see the following window.
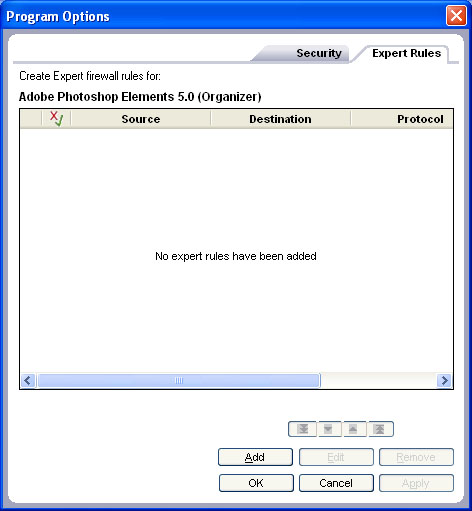
This is where you write program expert rules. Just click this add button.
General Area

First thing you want to determine is rank. For program expert rules all the rules are enforced equally, so the order doesn't make any difference, except for the blocking rule (to be explained later)
The second thing you want to determine is the Name of the rule. This is required so give it a name that you will know what it means.
Next you can add any comments in that you need to help your figure out later why you did this rule.
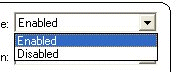
Next you need to pick the state. Enabled means this rule will be checked, disabled means that the rule will be ignored. This comes in handy when first writing rules and you need to find out what the problem is or if the rule is doing what you want it to.
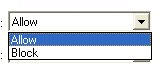
Next is the Action that you want. Allow means this rule allows a connection to go through. Block means this connection is blocked.
Next is the track options. Alert and log means you will get a popup and you will get an entry in the log that this rule was enforced. Not just that it was blocked, but that the conditions in the rule were met. Log will just give you a log entry, and then none means that you will not be told when this rule is met.

Source Area
Next is figuring out the source. You have several selections you can choose from for your source. First is My computer is just that, your own computer, Trusted zone is your computer and any others that have been listed in the trusted zone. Internet zone is everything that is not your computer or trusted, and any is both internet and trusted zone.
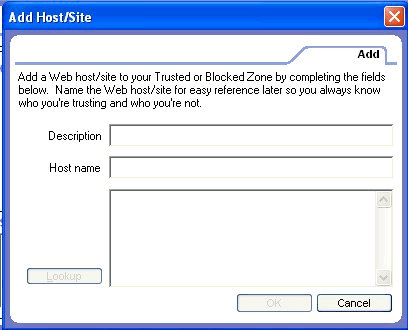
For Host or site you want to first give it a name, and then an web address, but don't enter in the http:// or ftp:// all you need is the web address. Then you need to click the lookup button to get the IP address.
Next is adding an IP address. Once again just give it a name and then enter in the IP address.

Next is adding an IP Range. Give it a name and then enter the first IP address and then the last IP address.

Next is a subnet. Again give it a name then enter in the base IP address, then enter in the subnet mask.

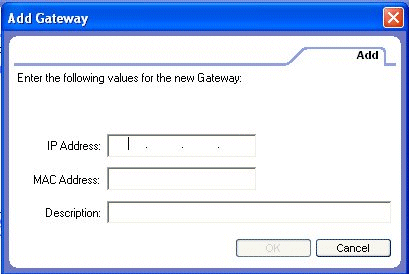
Next is adding a gateway. This is if you want to just allow traffic from your gateway for this rule, and no place else.
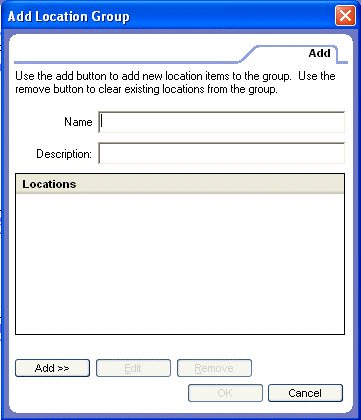
Next is an area where you can create groups of locations. When doing this you the same choices to add as above, the host / site, IP address, IP Range and Subnet. And you add them they same way.
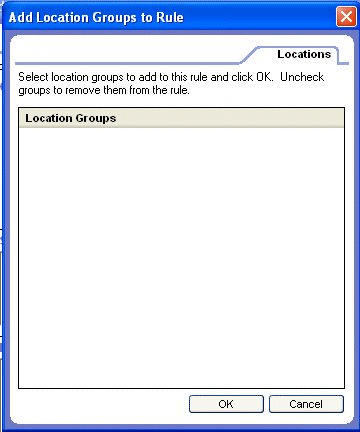
And next is used if you already have a group created that you want to add.
Destination Area
This section is identical to the Source area.
Protocol Area
Here is where you enter the protocol or Port number that you want to use for the rule, and there are several ways to do this also. You can also click on a protocol that you have added and edit it or delete it.

First is adding a protocol. First you need to give it a name then if the name of the protocol isn't in the protocol drop down list then just click on ANY and enter in the port number.

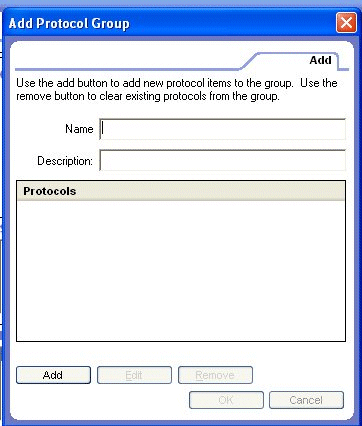
You can also add groups of protocols using this form,
And if you have an existing group you want to add to the rule, use this form,

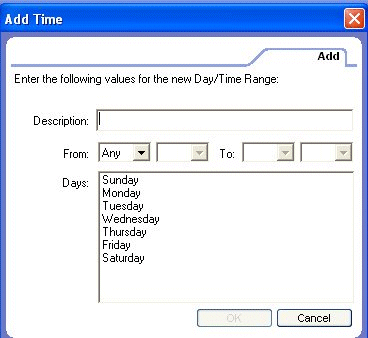
Time Area
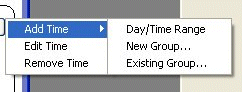
The last thing you can change for the expert rule is a time component. You can also click on an existing time component and edit it or remove it.
Again the first thing you do is give it a name, then select the times you want it to be in affect, then select the days you want it to be in affect. Use the ctrl and shft keys to select groups or add a day to the selection.
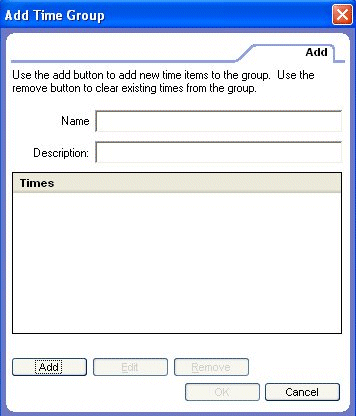
You can also create time groups to add.
And then if you have existing time groups you can then select those groups to add in.

Finishing The Expert Rules
Now all you have to do is click OK and that expert rule is done.